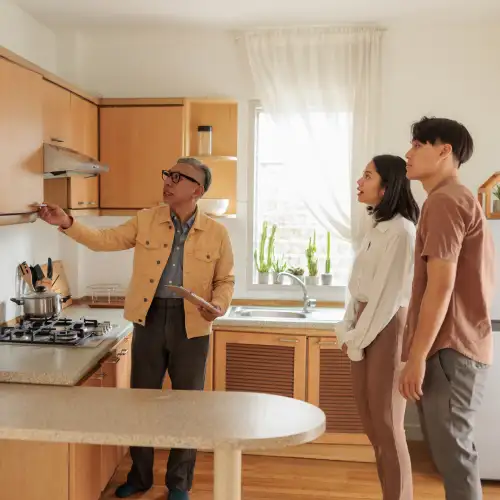
What is a final walkthrough?
When you buy a home, the walkthrough is your ultimate peace-of-mind moment before closing day. With some help from your real estate agent, you’ll take a room-by-room look at your new place after the seller has moved out and about a day or so before closing. This usually takes around 30 minutes, but try to set aside at least an hour so you don’t feel rushed.
While you walk around, you’re going to want to focus on two main things:
Ensuring everything is as agreed
Maybe the seller agreed to fix a faulty light switch, or said they’d leave their fridge behind. The walkthrough is where you’ll double-check that everything looks just like it’s supposed to, based on your purchase agreement.
Catching last-minute issues
The final walkthrough is also your chance to spot new problems that have popped up since your inspection. It’s a good idea to have your camera with you so you can take a snapshot of anything that stands out.
Pro Tip
Bring your final home walkthrough checklist, contract and inspection summary with you so it’s easier to check for missing items or repairs.
Why do a walkthrough before moving in?
Taking the time to do a thorough inspection when you buy a house can help you avoid headaches down the road. It can also keep you from breaking the bank on repairs that should’ve been handled before the seller moved out. Here’s why that final walkthrough matters.
Verifying repairs and condition
From fixing a broken appliance to repainting a room, there’s a big range of things that your seller might have agreed to handle. You’ll want to confirm those repairs have been made and everything in the house looks like you’re expecting it to.
If it looks like a repair hasn’t been done, or like it hasn’t been done correctly, let your real estate agent know right away. If you miss it or skip your walkthrough, you’ll be on the hook for repairs after you move in.
Spotting new issues
Hopefully, everything will look A-OK on your walkthrough. But if something’s changed since your inspection, this is your chance to take note and address it before you close on the house.
Your comprehensive final walkthrough checklist
There’s plenty of nooks and crannies to go over on your walkthrough, so how do you make sure nothing falls through the cracks? We’ve got you covered with the ultimate final walkthrough checklist before closing.
1. Verify inspection repairs
With your inspection report summary and signed offer letter as your guides, walk through the house and make sure everything’s been taken care of. Don’t forget to grab any warranties or receipts from the seller.
2. Check that belongings are moved out
Comb through the closets, attic and other spots of the house to see if everything’s been cleared out by the seller. If something’s supposed to be left behind, like fixtures or furniture, this is your chance to make sure it’s there.
3. Test locks and windows
You don’t want to skimp on safety, so give your locks and windows a close look. Check that all windows and doors lock and unlock smoothly, your windows slide open easily and there are no screen snags.
4. Ensure all appliances are working
Fire up the oven, run a cycle in the dishwasher, give the washing machine a spin and test out the garbage disposal. And don’t forget about the HVAC and security systems.
5. Look out for mold
Keep an eye out for mold, especially in spots where moisture might linger. That means looking extra closely under any sinks, in bathrooms and at any signs of water damage.
6. Check electricity and outlets
It’s time to flip your switches to make sure everything’s in working order. You’ll also want to test your outlets, so bring along something like a phone charger or multimeter.
7. Inspect the backyard and outdoors
It’s not just what’s on the inside that counts. Take a walk outside and get the lay of the land by checking your siding, deck, patio and any gates. You should also get a good look at the landscaping and test out that sprinkler system.
8. Watch for pests
There’s one last thing to do on your final walkthrough before closing checklist: look for any evidence of pests, from droppings to noises to nests, and pay extra attention to spots like the attic and garage. Don’t forget to inspect the chimney for any uninvited bird or raccoon guests.
What to do if you find issues during the final walkthrough
If you spot something that didn’t get fixed after your inspection or find a new problem that’s popped up, try not to panic. You’ve got a few options for how to handle any snags.
Address minor problems immediately
For smaller fixes, you can ask the seller to get them sorted. If they’re on board, just double-check that everything’s good to go before you sign your name on the dotted line.
Delay closing
If the problems are more than you bargained for, you can decide to delay closing. This can give the seller time to tie up those loose ends so your home is in great shape from day one.
Withhold funds for repairs
If the repairs are shoddy or incomplete, don’t fret. You can work with your realtor to have money for the repairs taken out of the seller’s proceeds. That way, you’re not left footing unexpected expenses once you’re in your new place.


